Wednesday, August 29, 2012

Homemade Chocolate Chip Cookies

Chocolate chip cookies may be the first thing I ever made as a kid.  I've learned a few things about the process since then, maybe you'll learn something too.  I welcome any comments or suggestions, as always.

Here's a bit of chocolate chip cookie trivia for you: the inventor of the chocolate chip cookie originally thought the chocolate would remain molten or soft even after the cookies had cooled.  I think I learned that from the stupid trivia they show at the movie theater before the previews begin.  It seems like the kind of fact they would put up there to get you thinking about food so you purchase something at the concession stand.

Ruth Wakefield was that inventor, and the above story is only part of what happened.  I did some searching on the trusty ol' internet here, and found this article from about.com, well, about the history of chocolate chip cookies.  They were invented right here in Massachusetts.  In the 1930's Wakefield and her husband ran a place called the Toll House Inn, and legend has it that she added the chocolate to some sugar cookies expecting it all to blend together.  Because she used Nestlé semi-sweet chocolate instead of unsweetened baker's chocolate the chocolate didn't melt; she worked out a deal with Nestlé and the Toll House cookie was born.  There is some disparity, however, in the reports of how she stumbled upon the recipe.  I learned from the Wikipedia page that the chocolate fell by mistake into the cookie dough, and only through the urging of one of her employees did Wakefield bake the cookies and not throw out the dough.  So says the employee who supposedly convinced her to keep the dough. Follow the links above to learn more.


You might be thinking, "there's no experimenting going on here, it's just the recipe from a bag of chocolate chips!"  And technically you'd be right, but I've been making chocolate chip cookies for so long I've got it down to a science.  I can make three dozen homemade chocolate chip cookies in under an hour with my eyes closed, especially now that I have the Kitchenaid stand mixer above.  This post fits under the category of tips and shortcuts, because if you follow the recipe as stated you'll waste both time and energy.

The recipe I used came from the package of Trader Joe's chocolate chips.  Every brand of chips has their own recipe and there are minor differences between each one, but there really isn't much of a  difference between the resulting cookies.
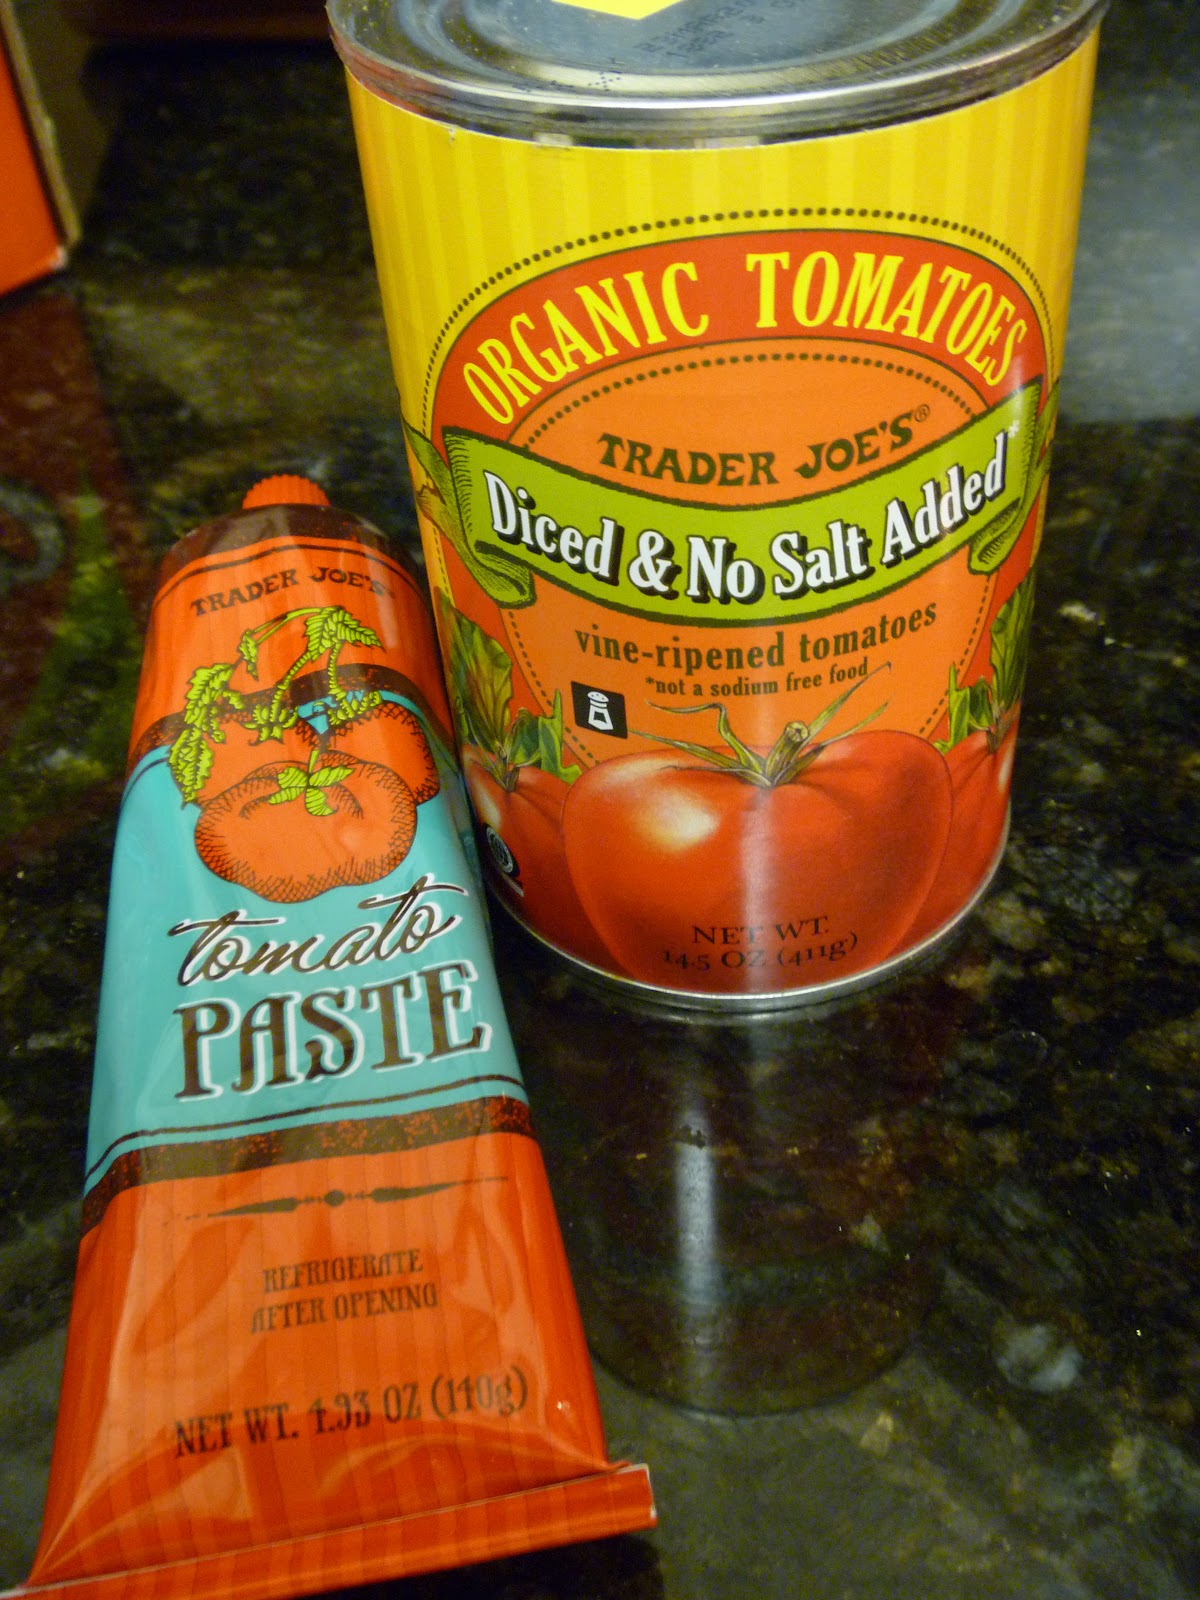
The ingredients

Chocolate Chip Cookies

2 1/4 cups all purpose flour
1 teaspoon salt
1 teaspoon baking soda
1 cup brown sugar, firmly packed
1/2 cup granulated sugar
1 cup softened butter or margarine
1 teaspoon vanilla extract
2 eggs
1 package semi-sweet chocolate chips

1 cup chopped nuts - optional

Form dough into balls and bake at 375° for 8 - 10 minutes.  Yields about 3 dozen cookies.


The first step is to begin melting the butter.  This is one of the only things I'll use a microwave for, at the low or defrost setting.  I avoid the microwave whenever possible, but the two things I will use it for are melting butter and defrosting bread.  I microwave it for 30 seconds at a time then stir until the butter is almost completely melted.  While the microwave is running I prepare the rest of the ingredients.

Beater attachment

The dry ingredients set aside


Next put the flour, salt, and baking soda in a small bowl.  Not the mixing bowl, but a separate bowl.  Put the vanilla, melted butter, and sugar into the mixing bowl and blend together until creamy.  I use the beater attachment; it seems to work well with chunkier ingredients like the chocolate chips.  Add the 2 eggs and continue to blend.  Next, slowly add the dry ingredients from the small bowl until the dough is well mixed.  Finally, add the chocolate chips.  I chose not to add nuts, although the cookies are good with walnuts or macadamias or white chocolate chips or I will occasionally add Trader Joe's Pecan Praline Granola, which comes out pretty good.  This time I kept it simple with chocolate chips only.

After adding the reserved dry ingredients
Vanilla, butter, and sugar


Adding the chocolate chips


Usually at this point I make the mistake of throwing away the wrapper for the chocolate chips, which also happens to be where the recipe is printed.  Only recently have I started to remember to keep it out so I can refer to the cooking time and temperature without having to reach into the trash and wash my hands again.

Ready to form into balls


Now that the dough is ready it's time to preheat the oven.  The first step of the directions is to preheat the oven, but I find this to be a waste of energy because it's usually preheated before the dough is ready.  By the time you've got one sheet of cookies ready to go in the oven it will be preheated; it's time to preheat the oven to 375°.  Before you do so, make sure both oven racks are near the center of the oven but not right next to each other; this will help the heat circulate when cooking two trays of cookies at once.

Forming the dough into balls

As the oven preheats, form the dough into balls about one inch in diameter.  The chocolate chips don't mix evenly into the dough, and as you form the balls try to pack the chips in.  I use two spoons, as shown, to pack the dough together and scrape it onto the baking sheet.  This keeps the cookies about the same size, although it's almost impossible to make them uniform.  We have three baking sheets, and each sheet holds 12 cookies.  It is possible to get 15 on a sheet but the recipe yields 3 dozen cookies so 12 makes sense.


First tray, ready for the oven
At this point the oven is preheated and ready for the first batch.  I set the timer for 8 minutes, the minimum cooking time, and form the remaining dough into about 24 more balls.  Sometimes you'll end up with a few more, sometimes with a few less.  If I end up with extra dough I'll add it to the existing dough balls before they go in, or conversely take some to form more cookies.  We have three cooling racks to match the three baking sheets, and I get these set up before the first batch comes out.

When the timer goes off check to see that the cookies are ready to come out.  The edges of the cookies should be browned a bit.  If they're not, give them another minute but keep a close eye on them; they can go from undercooked to burned very quickly.  Pull the baking sheet from the oven and set it on a cooling rack.  Give the cookies at least 10 minutes before trying to remove them from the baking sheet; keep the baking sheet on the cooling rack the whole time.

Browned at the edges

The top tray is cooking faster
The second batch will have two sheets of cookies in the oven at once, which will affect how they cook.  Set the timer for 8 minutes again and use that time to clean up the kitchen a bit.  When the time is up check the cookies as before, but keep in mind that one tray will cook faster than the other.  This will vary depending on where the oven racks are and other factors specific to your oven.  I'll pull the tray that is finished, give the timer another minute, and turn off the oven.  It'll keep enough heat to finish the last tray and if you somehow forget about them the cookies probably won't catch fire.


Chocolate lost to the baking sheet

The final pitfall of baking cookies is removing them from the baking sheets.  The temptation is to dig right in and start eating delicious cookies while they're warm.  You run the risk of losing some chocolate to the baking sheet, even if it's nonstick.  Knowing this I'll still eat some right away, and it can help to give the cookies a little twist back and forth, like you're trying to get rid of the static on an old fashioned radio dial.  Twist it a little back and forth and if it's not sliding easily choose another cookie.


When the cookies have cooled enough to remove them, transfer the cookies directly to the cooling racks to finish cooling down.  Time to pour a glass of milk and enjoy!


Sunday, August 19, 2012

Beef, Pork, and Veal Bolognese Sauce Revisited

Bolognese sauce, round two!  The sauce was great last time, but I couldn't help but wonder how the missing ingredients would have changed the flavor.  I couldn't live my life with that uncertainty hanging over my head forever; in my most recent post I'll find out or die trying.

I got the recipe for Beef, Pork, and Veal Bolognese Sauce from La Cucina Italiana magazine's website.  When I made it in July I had to omit the Italian sausage and pancetta, because I didn't have them.  The sauce was still tasty, but I couldn't help but wonder what it would have been like with those two ingredients.  Last week we finished the last of the frozen sauce (from July) so it's time for a new batch, this time with the missing ingredients.

The missing ingredients

I didn't get any pancetta, because I only wanted to shop at Trader Joe's and didn't want to use their cooked diced pancetta.  The recipe calls for pancetta or slab bacon, so I used regular strips of bacon because I am sure to use the remainder before it goes bad.  The sweet Italian sausage comes in one pound packages, but the recipe only calls for 2oz of sausage.  We don't eat a lot of Italian sausage, so I used two of the five sausages or around 6 ounces.  I used another can of tomatoes as well; last time I had a 28oz can but the recipe only needs 14 ounces.  Last time I had to throw away half of the tomato paste because once the can is open it spoils very quickly, but Trader Joe's finally sells tomato paste in a tube.  The extra tomato paste isn't exposed to air so it keeps when refrigerated.

The bacon and sausage are cooked with the battuto at the beginning of the recipe, but first they have to be cut and have the casing removed.  I did both with a pair of scissors; I worked the scissors into the end of the sausage and cut down one side of the sausage as seen below.

Pulling off the casing
Cutting the casing of the Italian sausage

About to add the mirepoix, bacon, and sausage


One of the sausages crumbled a bit as I was removing it from the casing, but the sausage gets broken up in the pot anyway.  I mixed the bacon and sausage with the mirepoix/battuto in the pot, and used a flat ended wooden spoon to break up the sausage and stir it all together.  The flat edge of the spoon will work well to keep the sauce off the bottom of the pot as it simmers.


Breaking up the sausage while stirring
At the end of 25 minutes at medium low heat
Simmering

I followed the rest of the recipe exactly as in my previous post.  I could smell the smokiness of the bacon as I was stirring the sauce, and it smelled good.  After adding the meat and tomato I didn't stir it quite as often as last time, but still didn't venture away from the kitchen for more than five minutes at a time.  It's good to have something to keep you entertained during this time, so I watched The Lord of the Rings on my computer in German, or Der Herr der Ringe: Die Gefährten.  It's funny to see characters whose voices you know speaking with other voices (and in another language).  Really I only mention it because I wanted to include a video in this post:


The first time I made this we ate it for dinner that night and it wasn't as flavorful as I thought it would be.  It could be because I was exposed to the aromas of the cooking sauce all day long, and because your nose becomes accustomed to smells over time it may affect your ability to taste those flavors.  Because it was so much better the very next day I concluded that it needs an overnight for the flavors to really soak into the sauce.  We tried this new batch the day I made it as well, but I found it to be much more flavorful.  It could be because I subconsciously knew that I had followed the recipe more closely, or it could be that the bacon and sausage actually gave it that extra something it needed.  I'm looking forward to trying this batch again now that it's had some time for the flavors to soak in; I wonder if it will improve as my first batch did.  

Friday, August 17, 2012

Introduction to Sandwiches, with Roast Beef and Cheese

Sandwiches might seem like a topic unworthy of devoting a post to, but you better believe I will be posting sandwich after sandwich on here because making sandwiches is a passion of mine.  Sandwich making really is a passion of mine, and there is much more to it than simply putting meat and cheese between two slices of bread.  Once you understand some of the basic sandwich making techniques it's just a question of trying different ingredient combinations or borrowing ideas from the menus of sandwich shops.  I did a presentation and sandwich tasting at work once, and I'm recycling some of that material in what follows here.  

Dagwood Bumstead
Rabbi Hillel the Elder was said to have invented the first sandwich around 2,000 years ago, when he pressed lamb and bitter herbs together between matzo bread.  The centuries that followed saw little advancement in sandwich technology.  The open-faced sandwich was common long before the name "sandwich" existed, and the bread served as more of a placemat or a sponge than a part of the entree.  When the meal was over the bread would usually be fed to the animals or beggars.  So how did the modern sandwich come into existence?  It is said that during a game of cribbage, the 4th Earl of Sandwich ordered meat between two pieces of bread to keep his fingers from getting greasy from the meat.  When others saw this they ordered "the same as Sandwich," and the name stuck.  The modern sandwich has come to mean something completely different in the United States.  The comic strip "Blondie" takes some of the credit, with Dagwood Bumstead's gigantic sandwich creations.  Nowadays the sandwich is a staple of lunches across the United States, for schoolchildren and adults alike.  The sandwich I'm making today is one to be eaten in the comfort of one's home, because there are different techniques that come into play when making a sandwich for later consumption.  

Some ingredients for a roast beef and cheese sandwich
Today I am making roast beef with American cheese and Boar's Head horseradish sauce.  This is one of the most frequently eaten sandwiches in my house because we both love horseradish.  Boar's Head makes a good horseradish sauce, not too spicy but enough to let you know it's there.  Of course everyone experiences spice differently, and if you don't like horseradish or wasabi I would use it sparingly.  Russian dressing is great on a roast beef sandwich if you don't like spicy, or mix half Russian dressing and half mayonnaise.  I'm using bulkie rolls, and this time I picked up potato rolls by mistake.  Their flavor isn't very far from that of white bread, and they have more protein and nutrients.  Land O'Lakes white American cheese is my favorite for most sandwiches, so I usually have a supply on hand, but provolone goes well with this sandwich too.  I have iceberg lettuce, which adds little nutrition to the sandwich but gives it a nice crunch when you eat it.  I used to frequent a sandwich shop that had roast beef, provolone, baby spinach, and Russian dressing on the menu.  Another had roasted red peppers and mayo, also delicious.  

Trim the corners of the cheese so it won't drip


Lucas getting ready to make his move


I begin by melting the cheese and toasting the bun in the toaster oven.  My toaster oven has two positions for the rack; I start with it in the higher position.  I put the top and bottom of the bun in with a slice of cheese on the top half of the bun.  I trim the corners of the slice of cheese so none drips onto the bottom of the toaster oven, which can shorten the life of the toaster oven quickly.  If the cheese drips onto the bottom coil of the oven it may catch fire or get smoky and set off the fire alarm.  It's important to keep the toaster oven clean, and the best way to do that is to prevent a mess from beginning.  In the higher position the cheese is right up close to the heating coil so it melts a little.

A good example of folded meat
While the cheese is melting I prepare the meat and lettuce for the sandwich and put the cold ingredients back into the refrigerator.  I wash and spin enough lettuce to give the sandwich at least two layers of lettuce.  My cats don't always agree about which human food they like, but they both agree that sandwich meat and cheese are delicious.  I use about 2 1/2 slices of meat for the average sandwich, and today is no exception.  When I was younger I worked in a sandwich shop, and it was there that I learned the importance of folding the meat.  For a sandwich with lots of meat like this it adds texture and makes the sandwich look even bigger than it is.  The process is hard to describe, but you want to keep the meat evenly distributed through the sandwich while giving it that ribboned, layered effect.  I leave the top of the bun with cheese in the still-warm toaster oven until I need it later.

One slice


Two and a half slices of roast beef
Two Slices

Some would put the bottom of the sandwich in the toaster at this point to take the chill off of the roast beef, but this can dry out the meat and ruin the sandwich.  At this point I remove the top of the bun from the toaster and add the lettuce and condiment.  The order that the ingredients go into the sandwich is very important, but I don't have any fun acronyms because it's not that complicated.  Think about what ingredients should be heated in the toaster oven and which should not and plan accordingly.  Many delicious sandwich condiments taste funny when warmed and putting lettuce in a toaster borders on negligence.  It's simple; begin with the ingredients to be warmed or toasted and add increasingly temperature-sensitive items as you get closer to finished.  Lettuce and sauce are almost always last.

With horseradish sauce
I made this sandwich for my wife, and she didn't want the lettuce.  Or to wait long enough for me to take a picture of the finished sandwich before she ate it.  But sometimes we get caught up in the glitz and glamour of making sandwiches and forget that it's supposed to be about eating lunch.

This particular sandwich was roast beef with cheese and horseradish sauce.  I covered some techniques like melting the cheese and toasting the buns in a toaster oven, layering the meat, and the order of ingredients.  You can tell from the list of ingredients that substitutions can and should be made based on what's in the fridge; that's how new sandwiches are discovered.  Who knows, someday they may name a sandwich after you!  Dare I to dream?  

Monday, August 13, 2012

Whole Wheat Sunflower Seed Bread

Again I will attempt to duplicate the delicious bread we had for breakfast every day on vacation last month.  It was a light and airy whole wheat bread with several different seeds on the crust.  Among the seeds on the bread were sunflower seeds, so I searched for a recipe for whole wheat sunflower seed bread and found this one from food.com: http://www.food.com/recipe/whole-wheat-bread-with-sunflower-seeds-123305.  The recipe is deceptively simple; the entire process is condensed into one step.  It has sunflower seeds in it and not on it, but later I'm going to experiment with adding them to the crust.

Whenever I get a recipe from a website I download a PDF of the recipe, and now that I have this blog I always recommend that you do the same, in case you enjoy the bread and can't find the recipe again.  Of course, I have a copy of it, so if it is unavailable at the above website leave a comment below or drop me an e-mail.  I can send it to you, provided I won't be violating any copyright laws.

The assembled ingredients
So again I'm using the white whole wheat flour from Trader Joe's, and this time I actually did some research as to what the difference is between it and regular whole wheat flour.  When I say research, I mean I read the Wikipedia page about them.  There are a few differences, the main one being that they come from different kinds of wheat.  White whole wheat flour comes from white hard spring wheat, rather than the red wheat traditional whole wheat flour comes from, and white whole wheat has a lower gluten content.  Gluten gives bread the light, airy texture by preventing the gas produced by the yeast from escaping the bread.  The recipe calls for 1/4 cup of gluten, so I added a pinch more to offset the difference between the flours.

Wheat gluten

Raw honey after stirring


The honey I used is raw honey that has all the pollen, bits of comb, and everything else that's in honey before it's refined into the homogenous syrup we're used to.  It might seem foolish to bake with raw honey, since heating it will kill some of the enzymes and negate the benefits of raw honey, but the only other honey we have is local honey and even more expensive.  It'll provide sugar for the yeast to react and give it good flavor, so raw honey it is.  I didn't think to take a picture of it before I stirred it up, but before stirring there is about an inch of comb and solids that has to be mixed in.  You can see the bits that are still stuck to the side of the jar, they give the honey a texture that makes it even more delicious.

The recipe doesn't say anything about warming the water, but I always thought that yeast reacts better in water between 130 and 140 degrees.  I decided to warm the water before adding it to the mix.  Everything but the flour goes in the mixing bowl and I used the dough hook on a low speed to mix it.  It's very fluid and when I turned up the mixer it started to spill, so take it slow.  Add 1 1/2 cups of the flour, mix again, and let stand for 30 minutes.

The sponge ready to ferment

I learned a new term from this recipe; it tells you to start with a sponge.  I knew this had to mean something other than a sponge used for cleaning, so I looked it up.  A sponge is like a bread starter.  You start the yeast fermenting early and it is supposed to help give the bread a more complex flavor, but I'm just following the instructions for this bread.  I'll play around with this more in future attempts.


Jack guarding the sponge as it rises

After 30 minutes, add the last 2 cups of flour and mix again.  I used the mixer and the dough hook as long as I could for this, but inevitably there is some dry flour left at the bottom that doesn't make it into the dough.  I used the spatula to try and fold the flour into the dough, but after a while the mixer wasn't cutting it anymore.  I took the dough out and flattened it a little, put the extra flour in the center, and kneaded it by hand from there.  It seemed a little dry, so I added a little water by wetting my hands then kneading until it's absorbed.

Kneading the dough
Working in the flour from the bottom of the bowl


The dough goes into a greased bowl to rise for 1 1/2 to 2 hours.  I always side with giving it more time to rise, so I set the kitchen timer for two hours and left it somewhere my cat can't get it.

The sunflower seeds didn't really stick
Before rolling in seeds


The recipe tells you to shape the dough and put it in a loaf pan, but the bread I'm trying to make was somewhere between a baguette shape and a loaf shape, so I tried to make my own shape without the loaf pan.  This would also let me use our pizza stone to cook it.  I rolled it in a tablespoon or two of sunflower seeds (above what the recipe calls for) but they didn't really stick.  I tried to pat the seeds into the bread then let it rise for another 30 minutes.  The sunflower seeds didn't stick very well then either; I kept having to push them in again.  While the dough was rising I decided to see what the internet thought about preheating the pizza stone or putting it in the oven cold.  What I found was a very informative website, a pizza oven company called Forno Bravo, and their page on steaming bread.  It's a company that makes gigantic pizza ovens for residential and commercial needs, and there's a lot to learn from this website so I'd recommend checking out some of the recipes and tips.  I learned a few techniques that I plan on using in the future, but there were two that I applied to this recipe.

Preheating the pizza stone

Spray bottle with water


First, I preheated the oven (with the stone inside) for 30-45 minutes at a temperature 75 degrees higher than the original recipe called for.  When the oven opens later during baking this will ensure the temperature is high enough.  Before preheating the oven I rearranged the oven racks so there would be plenty of room above the pizza stone to drop the dough onto, and space for a baking pan beneath.

Second, I brought two cups of water to a boil on the stovetop.  This will be used to steam the bread as it bakes, which helps give it a nice crust.  I got the spray bottle we use to discipline our cats (spray them with water when they misbehave) and got ready to put the bread in the oven.  I opened the oven and sprinkled some flour on the pizza stone to keep the bread from sticking, then slid the dough onto the stone.  I poured the boiling water into the baking pan, then used the spray bottle to spray the inside walls of the oven with water.  The Forno Bravo website said to do this three times, each 30 seconds after the previous spray.  I did the first, then forgot to do the second until 2 minutes had passed, then did the third after another minute or so.  In the course of spraying the walls of the oven I managed to spray the bread a little, but there wasn't much I could do about it once it happened.  I didn't get this part quite right, but next time I'll pay closer attention.

The baking pan with water provides the steam as the bread continues to bake, and boiling the water ensures that it turns to steam right away in the oven.  This bread made the apartment smell amazing as it cooked, and I had a good feeling about how it would come out.  When it was finished baking I tried to rub it with butter straight from the refrigerator but succeeded only in knocking lots of sunflower seeds off; I ended up cutting some small slices of butter and leaving them on top to melt before rubbing it in.

Just out of the oven, before rubbing with butter
Jack approves.  Rubbing with butter gives it a nice shine


It wasn't quite as airy as I hoped, but the flavor is great and it's not as dense as the Whole Wheat Walnut Bread.  The crust came out pretty good too with a nice crunch.  It's impossible to duplicate bread baked on the other side of the world due to small differences in the ingredients, in the water, and even in the composition of the air.  I may not ever be able to get it exact, but I'm getting closer.  I'm looking forward to breakfast tomorrow.

The finished product

Saturday, August 4, 2012

Rahmschnitzel: Medallions of Pork with Cream Sauce

Tonight I have assembled the ingredients, consulted my notes, and reviewed my pictures to try and duplicate one of my wife's favorite dishes: rahmschnitzel.  Rahm translates literally into cream in German, and while schnitzel translates to cutlet it means more than just cutlet.  Schnitzel can be pork, chicken, beef, or anything else that could be a local specialty.  It could be breaded, it could be plain, in sauce, with sauce, with French fries or anything else, but I've never seen schnitzel that wasn't fried.  Most people have heard of Wienerschnitzel, and that too is delicious.  But my wife's stepmom explained to me how she makes rahmschnitzel and let me watch her do it, so here's my attempt with ingredients from the US.


The assembled ingredients
Rahmschnitzel

1 - 1 1/4 lbs boneless pork tenderloin
3 tablespoons mustard (approximately)
2 tablespoons butter
1 tablespoon vegetable oil (I used safflower oil, it was all I had other than olive oil)
1 pint heavy cream
2 teaspoons salt (approximately)
1 teaspoon pepper (approximately)

1/2 lb egg pappardelle pasta

The boneless pork tenderloin came from Trader Joe's, I get a lot of Trader Joe's meat.  They have a marinated boneless pork tenderloin that's pretty good, but rahmschnitzel is more than pretty good.  When buying meat at Trader Joe's it is important to keep a few things in mind.  Trader Joe's cuts its meat at one central facility and packages it there; it is then shipped to their stores around the region.  The meat is not as fresh as what you would get from a local butcher or supermarket where they cut the meat on premises.  It also means you have to keep a close eye on expiration dates.  At Trader Joe's the most popular stuff is always the freshest because they can't keep it on the shelf long enough for it to go bad.

The next ingredient is when I fail in my attempt to use only US ingredients.  I forgot to buy mustard.  Fortunately, I have this awesome Thomy brand mustard; unfortunately, it comes from Switzerland.  It's a mild mustard, and it would be easy to substitute one from the US.  You could use something between yellow mustard and spicy brown, or Dijon mustard would work too.

We have these Furi knives, I guess they're Rachael Ray knives.  They're pretty good, and they come with this bamboo case.  They can probably cut a Volkswagen in half then immediately cut a tomato the same way.


Preparing medallions of pork


Rubbed with mustard


Jack keeping an eye on the butter for me


Cut the pork tenderloin into medallions about 1/2 an inch thick, and rub them with the mustard.  The pork will have to be fried in shifts; there isn't enough room in the pan to fit it all at once.  Set the oven to 70 degrees celsius, which is roughly 160 degrees farenheit, to keep the pork warm as the rest of it cooks.  Put the pork aside and warm the butter and oil in a large saucepan over high heat.  The original recipe uses some kind of butter that's specially made for frying things, and for some reason I substituted butter and oil for it.  Around this time I turned my back, and when I came back my cat had eaten the butter right out of the pan.  I got some more butter, scolded my cat, and began again.  When the oil/butter mix starts to sizzle add the medallions of pork, cooking them for a few minutes on each side.  I should have timed how long each was in the pan, but I just watched and waited until I thought enough time had passed.  When I turned them over and they were browned to the right level I was glad.  You want each side slightly browned on the outside; it's probably best to try and duplicate what's pictured below.

One side finished
I put the cooked pork in a glass pyrex baking dish, added some salt and pepper, covered it with foil, and put it in the warm oven.  Keep all of the oil and drippings in the pan, and don't pat dry the cooked medallions at all.  The amount of pork I had only required two round of frying in the pan, but I kept the first round in the oven while the second fried.  When the second round of medallions was finished I added them to the pyrex with the others, then salted and peppered again.  I returned the pyrex to the oven.

When I finished cooking the pork I realized that I should have started water boiling earlier for the pasta.  When the pork is done the cream sauce is made right in the same pan, so it's best to start boiling the water before the pork is finished.

When I saw this dish prepared it got 4 dl (deciliters) of heavy cream and had twice as much pork as I prepared.  In the US we sell pints of heavy cream, and one pint is about 473 ml or 4.73 dl.  All that resulted from these conversion errors is an excess of cream sauce.  More than twice as much cream sauce as is needed.  There are worse mistakes to make.

Pour the heavy cream into the saucepan, then take the pyrex from the oven and also pour the drippings into the saucepan.   Stir the mixture constantly for at least 8 minutes at low to medium heat.  I played with the heat setting constantly, and I probably should have kept it closer to medium to cook the sauce down more.  It needs close attention and lots of stirring or the sauce will burn, and you want all of the flavor from the pan in the sauce.  There is a secret ingredient that my stepmother-in-law used at this step, something called "Fond de Veau Concentre."  It's basically beef bouillon, salt, onion powder, chicken powder, and some other things that don't seem very natural.  If you don't have enough drippings from the pork or want to make a lot of extra sauce, this is a shortcut to give it flavor.  This is an ingredient not available in the US so I will not use it this time.

Be careful not to drop the pork


When 8 minutes have passed remove the pyrex from the oven again and pour the sauce over the pork.  Return the whole thing to the oven and you have time to prepare a salad, finish cooking the noodles, or do anything else to prepare for the meal.

Add the sauce to the pork and return to the oven
This came out quite good.  The pork was still a little pink, which is something that used to be unheard of.  Pork can contain tapeworm and other illness causing things, and it can still be dangerous to eat undercooked pork, but in today's world where we understand germs and proper food handling procedures it's no longer necessary to overcook it.  I think the next time I make this I will use a bit more salt, and cook the cream sauce down a bit more.  I used some very fancy, very delicious, and very expensive egg pappardelle pasta; I didn't need to spring for the $6.99 per 8.8 oz package pasta.  But it was delicious.  There is no question that I will make this dish again, and next time  I will try it with the Fond de Veau that I brought back from vacation.  It's certainly not necessary, however, to make this dish fantastic.

Ready to eat