Again I will attempt to duplicate the delicious bread we had for breakfast every day on vacation last month. It was a light and airy whole wheat bread with several different seeds on the crust. Among the seeds on the bread were sunflower seeds, so I searched for a recipe for whole wheat sunflower seed bread and found this one from food.com:
http://www.food.com/recipe/whole-wheat-bread-with-sunflower-seeds-123305. The recipe is deceptively simple; the entire process is condensed into one step. It has sunflower seeds in it and not on it, but later I'm going to experiment with adding them to the crust.
Whenever I get a recipe from a website I download a PDF of the recipe, and now that I have this blog I always recommend that you do the same, in case you enjoy the bread and can't find the recipe again. Of course, I have a copy of it, so if it is unavailable at the above website leave a comment below or drop me an e-mail. I can send it to you, provided I won't be violating any copyright laws.
 |
| The assembled ingredients |
So again I'm using the white whole wheat flour from Trader Joe's, and this time I actually did some research as to what the difference is between it and regular whole wheat flour. When I say research, I mean I read the
Wikipedia page about them. There are a few differences, the main one being that they come from different kinds of wheat. White whole wheat flour comes from white hard spring wheat, rather than the red wheat traditional whole wheat flour comes from, and white whole wheat has a lower gluten content. Gluten gives bread the light, airy texture by preventing the gas produced by the yeast from escaping the bread. The recipe calls for 1/4 cup of gluten, so I added a pinch more to offset the difference between the flours.
 |
| Wheat gluten |
 |
| Raw honey after stirring |
The honey I used is raw honey that has all the pollen, bits of comb, and everything else that's in honey before it's refined into the homogenous syrup we're used to. It might seem foolish to bake with raw honey, since heating it will kill some of the enzymes and negate the benefits of raw honey, but the only other honey we have is local honey and even more expensive. It'll provide sugar for the yeast to react and give it good flavor, so raw honey it is. I didn't think to take a picture of it before I stirred it up, but before stirring there is about an inch of comb and solids that has to be mixed in. You can see the bits that are still stuck to the side of the jar, they give the honey a texture that makes it even more delicious.
The recipe doesn't say anything about warming the water, but I always thought that yeast reacts better in water between 130 and 140 degrees. I decided to warm the water before adding it to the mix. Everything but the flour goes in the mixing bowl and I used the dough hook on a low speed to mix it. It's very fluid and when I turned up the mixer it started to spill, so take it slow. Add 1 1/2 cups of the flour, mix again, and let stand for 30 minutes.
 |
| The sponge ready to ferment |
I learned a new term from this recipe; it tells you to start with a sponge. I knew this had to mean something other than a sponge used for cleaning, so I looked it up. A sponge is like a bread starter. You start the yeast fermenting early and it is supposed to help give the bread a more complex flavor, but I'm just following the instructions for this bread. I'll play around with this more in future attempts.
 |
| Jack guarding the sponge as it rises |
After 30 minutes, add the last 2 cups of flour and mix again. I used the mixer and the dough hook as long as I could for this, but inevitably there is some dry flour left at the bottom that doesn't make it into the dough. I used the spatula to try and fold the flour into the dough, but after a while the mixer wasn't cutting it anymore. I took the dough out and flattened it a little, put the extra flour in the center, and kneaded it by hand from there. It seemed a little dry, so I added a little water by wetting my hands then kneading until it's absorbed.
 |
| Kneading the dough |
 |
| Working in the flour from the bottom of the bowl |
The dough goes into a greased bowl to rise for 1 1/2 to 2 hours. I always side with giving it more time to rise, so I set the kitchen timer for two hours and left it somewhere my cat can't get it.
 |
| The sunflower seeds didn't really stick |
 |
| Before rolling in seeds |
The recipe tells you to shape the dough and put it in a loaf pan, but the bread I'm trying to make was somewhere between a baguette shape and a loaf shape, so I tried to make my own shape without the loaf pan. This would also let me use our pizza stone to cook it. I rolled it in a tablespoon or two of sunflower seeds (above what the recipe calls for) but they didn't really stick. I tried to pat the seeds into the bread then let it rise for another 30 minutes. The sunflower seeds didn't stick very well then either; I kept having to push them in again. While the dough was rising I decided to see what the internet thought about preheating the pizza stone or putting it in the oven cold. What I found was a very informative website, a pizza oven company called
Forno Bravo, and their
page on steaming bread. It's a company that makes gigantic pizza ovens for residential and commercial needs, and there's a lot to learn from this website so I'd recommend checking out some of the recipes and tips. I learned a few techniques that I plan on using in the future, but there were two that I applied to this recipe.
 |
| Preheating the pizza stone |
 |
| Spray bottle with water |
First, I preheated the oven (with the stone inside) for 30-45 minutes at a temperature 75 degrees higher than the original recipe called for. When the oven opens later during baking this will ensure the temperature is high enough. Before preheating the oven I rearranged the oven racks so there would be plenty of room above the pizza stone to drop the dough onto, and space for a baking pan beneath.
Second, I brought two cups of water to a boil on the stovetop. This will be used to steam the bread as it bakes, which helps give it a nice crust. I got the spray bottle we use to discipline our cats (spray them with water when they misbehave) and got ready to put the bread in the oven. I opened the oven and sprinkled some flour on the pizza stone to keep the bread from sticking, then slid the dough onto the stone. I poured the boiling water into the baking pan, then used the spray bottle to spray the inside walls of the oven with water. The Forno Bravo website said to do this three times, each 30 seconds after the previous spray. I did the first, then forgot to do the second until 2 minutes had passed, then did the third after another minute or so. In the course of spraying the walls of the oven I managed to spray the bread a little, but there wasn't much I could do about it once it happened. I didn't get this part quite right, but next time I'll pay closer attention.
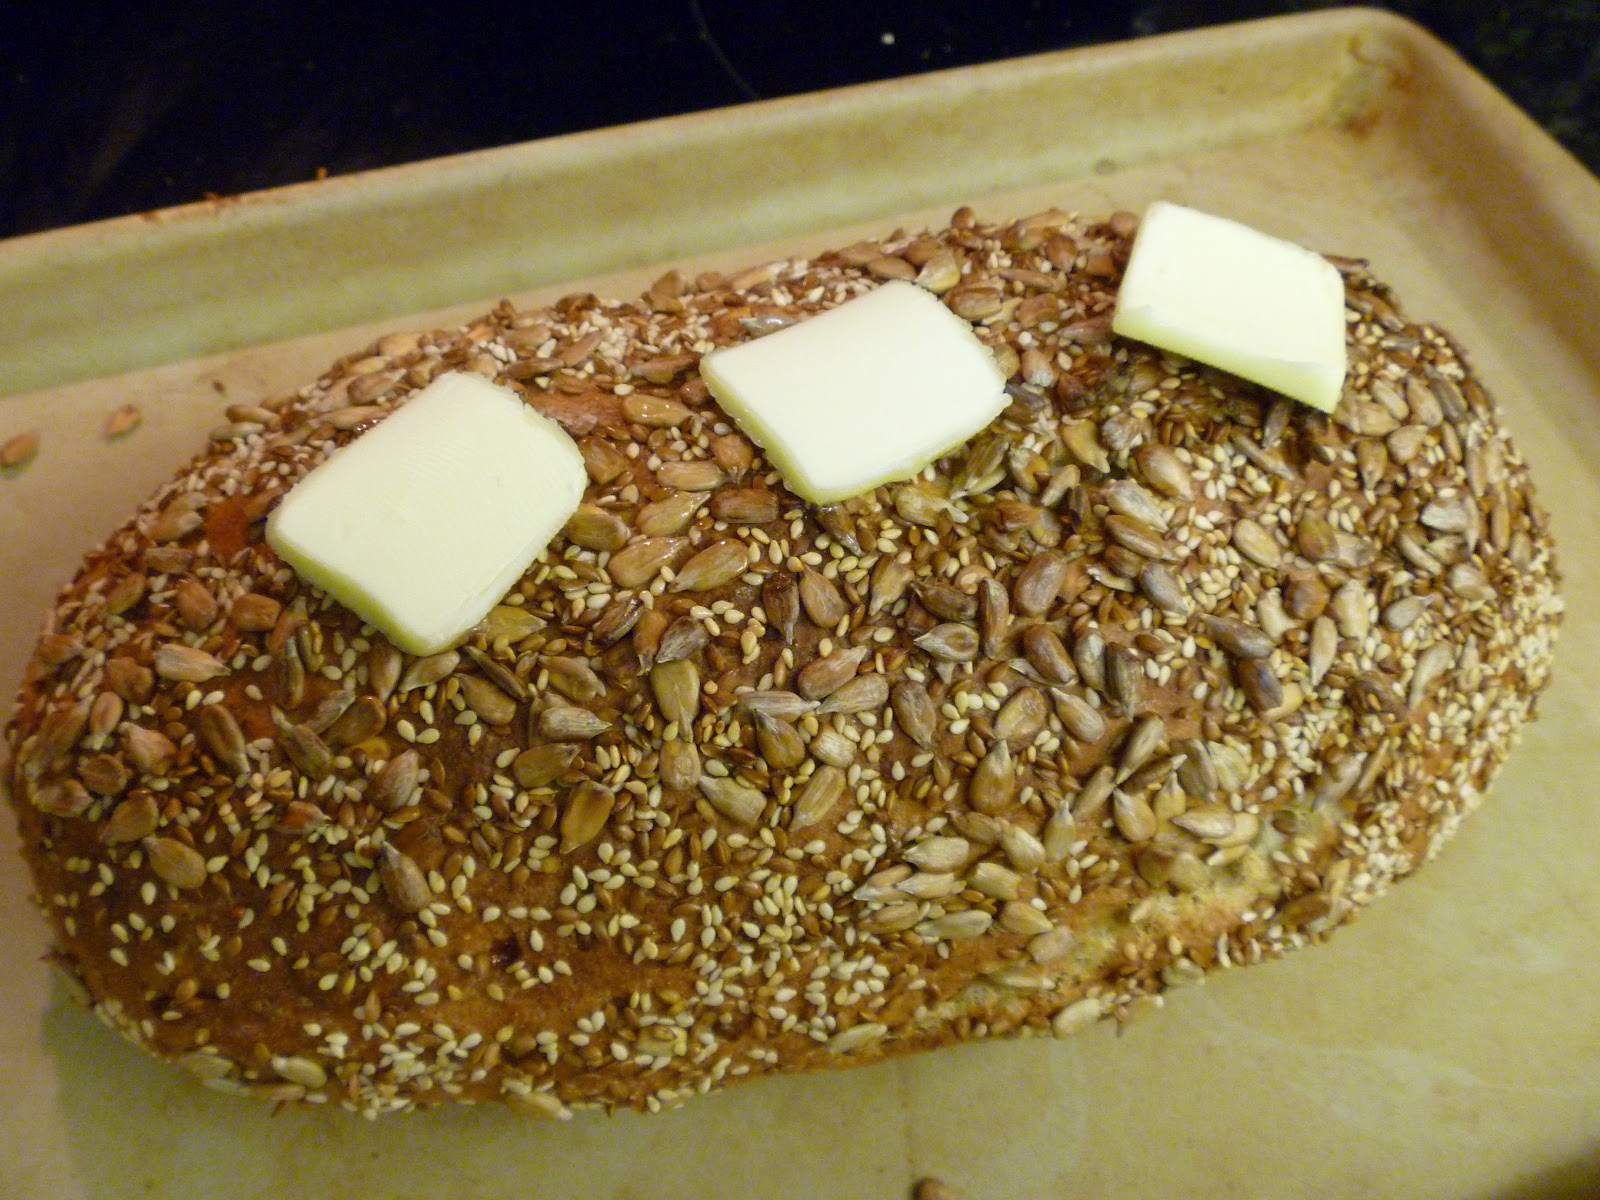
The baking pan with water provides the steam as the bread continues to bake, and boiling the water ensures that it turns to steam right away in the oven. This bread made the apartment smell amazing as it cooked, and I had a good feeling about how it would come out. When it was finished baking I tried to rub it with butter straight from the refrigerator but succeeded only in knocking lots of sunflower seeds off; I ended up cutting some small slices of butter and leaving them on top to melt before rubbing it in.
 |
| Just out of the oven, before rubbing with butter |
 |
| Jack approves. Rubbing with butter gives it a nice shine |
It wasn't quite as airy as I hoped, but the flavor is great and it's not as dense as the
Whole Wheat Walnut Bread. The crust came out pretty good too with a nice crunch. It's impossible to duplicate bread baked on the other side of the world due to small differences in the ingredients, in the water, and even in the composition of the air. I may not ever be able to get it exact, but I'm getting closer. I'm looking forward to breakfast tomorrow.
 |
| The finished product |